
Codex
Codex Installation and Configuration Guide
Windows Tutorial
System Requirements
Installation Steps
Install Git Bash by visiting Git - Downloads to download the version for your system, then click "Next" through the installation process.
Visit the Node.js Official Website to download and install the latest LTS version.
Open Command Prompt (CMD) or PowerShell, and run:
Open Command Prompt (CMD) or PowerShell, and run:
Configure API
Visit the Crazyrouter website and perform the following:
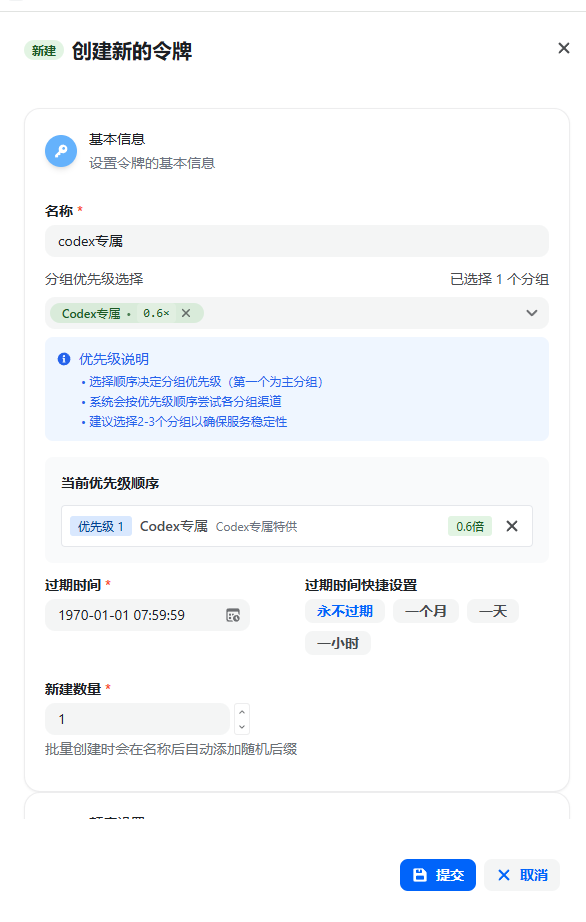
Important: Replace sk-xxxbelow with your actual API key generated from Crazyrouter!
Important: Replacesk-xxxbelow with your actual API key generated from Crazyrouter!
Important: Replacesk-xxxbelow with your actual API key generated from Crazyrouter!
1.
.codex folder in your user directory, e.g., C:\Users\testuser\.codex.(Note: If you cannot see this directory, you haven't enabled "Show hidden items" in Windows. Please enable it in File Explorer first.)
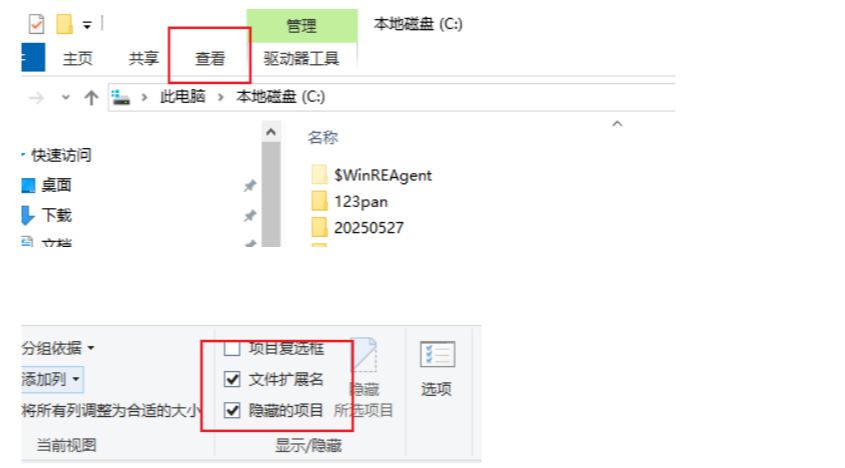
2.
.codex folder doesn't exist, manually create it, then create two files inside: config.toml and auth.json.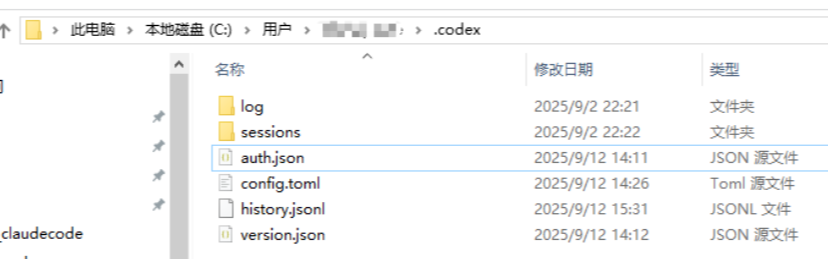
3. Fill in the configuration (replace
sk-xxx with your actual SK).auth.json:{"OPENAI_API_KEY": "sk-xxx"}config.toml (just paste the content below):model_reasoning_effort options are high, medium, low, representing the model's thinking effort level.model_provider = "api111"
model = "gpt-5-codex"
model_reasoning_effort = "high"
disable_response_storage = true
preferred_auth_method = "apikey"
[model_providers.api111]
name = "api111"
base_url = "https://api.crazyrouter.com/v1"
wire_api = "responses"Launch codex
Then navigate to your project directory:
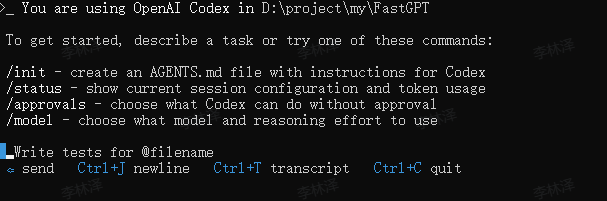
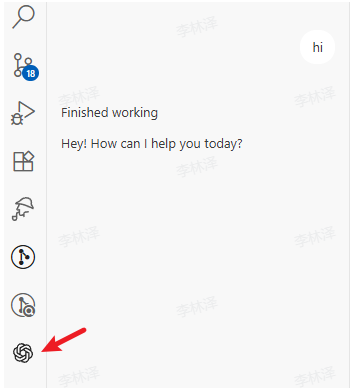
VSCode codex Extension
codex in the VSCode Extension Marketplace.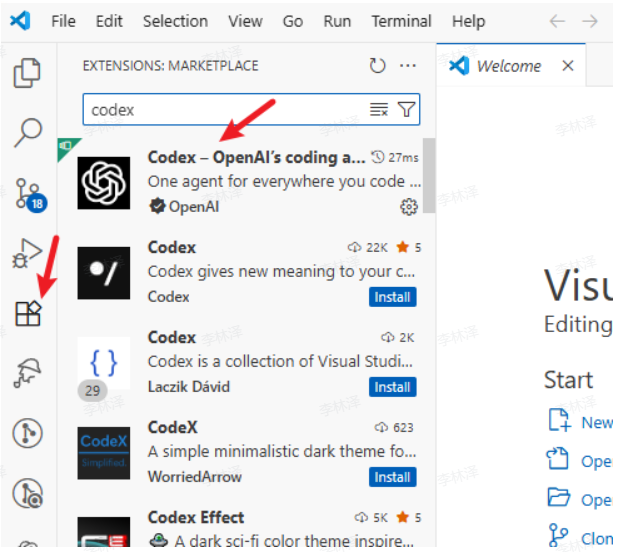
Once installed, it will appear in the sidebar.
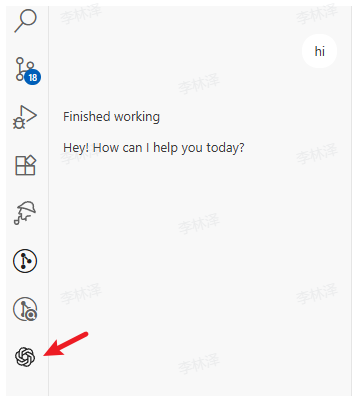
Mac Tutorial
System Requirements
Installation Steps
Open Terminal and run (may require
sudo):Open Terminal and run:
Configure API
Visit the Crazyrouter website and perform the following:
Important: Replace sk-xxxbelow with your actual API key generated from Crazyrouter!
Important: Replacesk-xxxbelow with your actual API key generated from Crazyrouter!
Important: Replacesk-xxxbelow with your actual API key generated from Crazyrouter!
1.
2.
auth.json file:i to enter insert mode, paste the following content (replace sk-xxx with your key), then press ESC, type :wq and press Enter to save and exit.{"OPENAI_API_KEY": "sk-xxx"}3.
config.toml file:i to enter insert mode, paste the following content, then press ESC, type :wq and press Enter to save and exit.model_provider = "api111"
model = "gpt-5-codex"
model_reasoning_effort = "high"
disable_response_storage = true
preferred_auth_method = "apikey"
[model_providers.api111]
name = "api111"
base_url = "https://api.crazyrouter.com/v1"
wire_api = "responses"Launch codex
Then navigate to your project directory:
VSCode codex Extension
codex in the VSCode Extension Marketplace.[Image]
[Image]
Linux Tutorial
System Requirements
Installation Steps
Open Terminal and run:
Open Terminal and run:
Configure API
Visit the Crazyrouter website and perform the following:
[Image]
Important: Replace sk-xxxbelow with your actual API key generated from Crazyrouter!
Important: Replacesk-xxxbelow with your actual API key generated from Crazyrouter!
Important: Replacesk-xxxbelow with your actual API key generated from Crazyrouter!
1.
2.
auth.json file:i to enter insert mode, paste the following content (replace sk-xxx with your key), then press ESC, type :wq and press Enter to save and exit.{"OPENAI_API_KEY": "sk-xxx"}3.
config.toml file:i to enter insert mode, paste the following content, then press ESC, type :wq and press Enter to save and exit.model_provider = "api111"
model = "gpt-5-codex"
model_reasoning_effort = "high"
disable_response_storage = true
preferred_auth_method = "apikey"
[model_providers.api111]
name = "api111"
base_url = "https://api.crazyrouter.com/v1"
wire_api = "responses"Launch codex
Then navigate to your project directory:
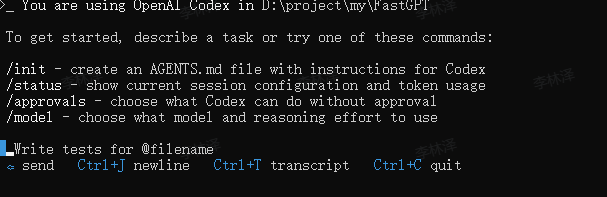
VSCode codex Extension
codex in the VSCode Extension Marketplace.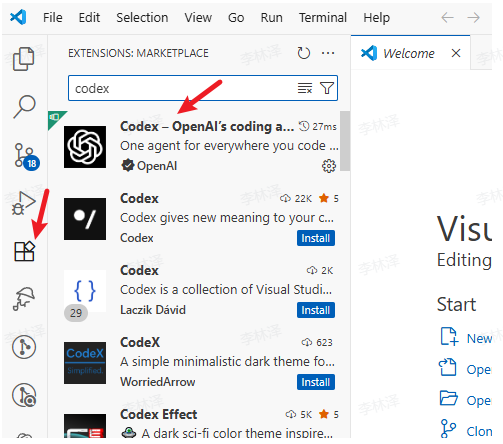
Once installed, it will appear in the sidebar.
FAQ
1.
Last verified/modified: 2026-09-28 (API base URL unified to https://api.crazyrouter.com, 3 occurrence(s); account/console stays https://crazyrouter.com)
Modified at 2026-09-28 12:50:39